The SUMO Scheduler Extension for Agentforce (Available with v23.7 and extension package) enhances productivity by automating meeting scheduling, planning, and follow-ups directly within Salesforce or an external community/website. This package includes three powerful tools:
-
Meeting Booker – Schedule meetings seamlessly.
-
Pre-Call Planner – Prepare for meetings efficiently.
-
Follow-Up Assistant – Automate post-meeting communication.
Implementation Guide
Purpose:. This guide walks you through setting up the SUMO for Agentforce extension package and configuring its topics within your External and Internal Employee Agents. Follow the steps listed below to ensure a smooth deployment.
Please reach out to our support team directly through our knowledgebase chat with any questions or email us at support@sumoscheduler.com.
1. Prerequisites
Before starting, ensure you have:
- SUMO Scheduler version 23.7 or above installed and configured in your org.
- Appropriate Salesforce permissions to install packages, deploy metadata, and configure Embedded Service.
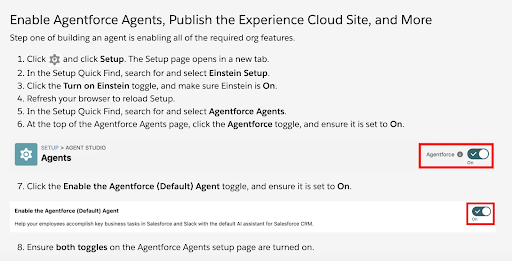
- Enable Agentforce:
- Access to Experience Cloud site setup (for external agents only).
2. Install and Configure SUMO Scheduler
Admin Setup
- Navigate to SUMO Admin Settings in Salesforce.
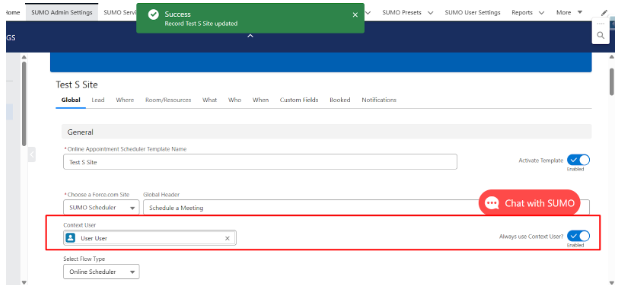
- Configure an Online Scheduler process . For an external agent, set the context user and always run with that user.
- Assign licenses to users using the User License Manager to users that need to use Meeting Booker. Meeting Booker requires Assistant Suite or Meeting Booker Assistant licenses. (This will also assign the appropriate permission sets needed for the feature)
- Make sure Einstein is activated. Go to Setup -> Quick Find -> Einstein Setup > Turn on Einstein
User Setup
- Connect calendars, ensure there is availability for the user, and they have been assigned to services.
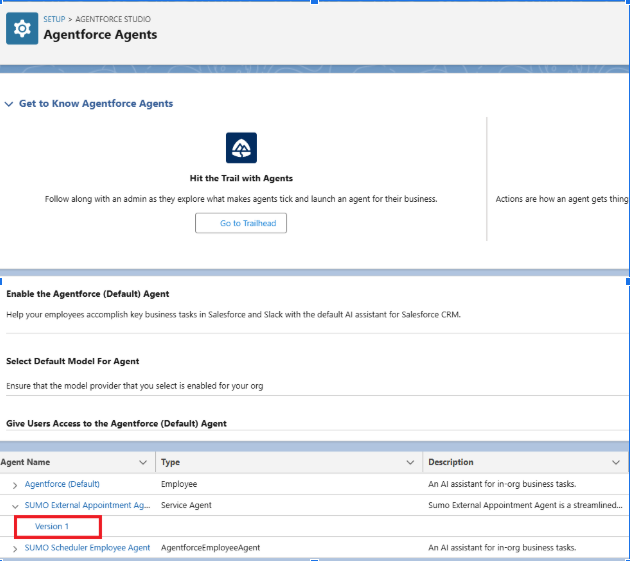
3. Install the Agent Package
- SUMO Org: SUMO Agentforce Package
4. Create the External Appointment Agent
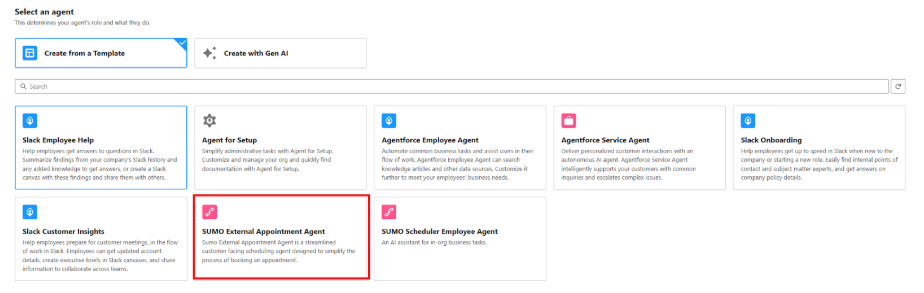
- Go to Setup -> Quick Find -> Agentforce Agents > New Agent.

- Scroll to the bottom and select the SUMO External Appointment Agent template.
- Press Next on Select your agent’s topics. It will automatically add all the actions to the agent.
- Fill out the Role and Company e.g.:
- Role: An appointment booking agent that gathers the necessary information such as customer information, location, appointment type, service type, and date time. Then using the necessary information to book an appointment.
- Company: SUMO Scheduler
- Make sure to create a New Agent User, and then press Next.
- If an issue arises when creating a New Agent User, manually create one and assign it to that user.

- (Optional) Add data libraries that you want your agent to be able to view such as Knowledge Articles or files.
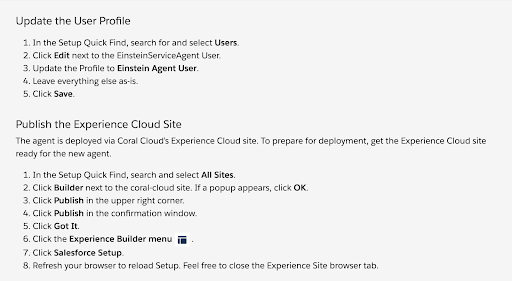
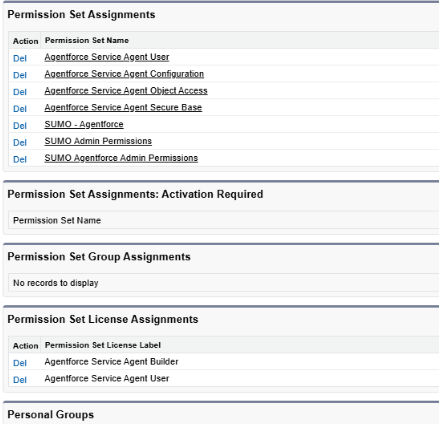
- After successfully creating the agent, make sure to assign the correct permissions to the new Agent User, typically named: EinsteinServiceAgent User.
5. Create Agent Settings
- Open Agent Builder by clicking on Version 1 of the Agent
- Ask the agent to get set up.
- If no SUMO Agent Setting exists, one will be created via a process of selecting the scheduling process record to link the agent to.
- Ensure the Scheduling Process linked to the agent has a Context User selected, if external, so the process always runs with the right permissions.
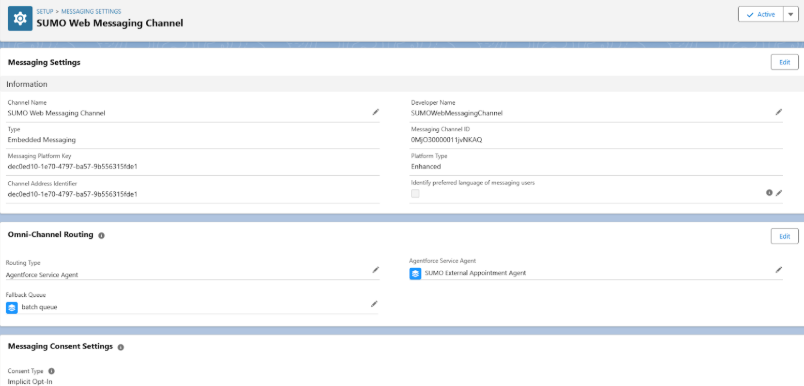
6. Configure Embedded Service Deployment (External Agent Only)
- Follow Salesforce’s documentation to set up an Embedded Service
- Link the deployment to your Experience Cloud site.
- Connect the external agent to this deployment by editing the messaging channel.
7. Add Additional Topics and Components
- Add Qualification topics, Pre-Chat Forms, or any other relevant flows to the agent or embedded service to improve its capability.
- Update conversation flows and prompts as needed to match your customer experience goals.
8. Internal Agent Setup
For the Internal Employee Agent:
- Follow the same configuration steps and choose Sumo Scheduler Employee Agent in step 4.2, skipping the Embedded Service setup.
9. Testing
- Test the external agent from the Experience Cloud site to ensure:
- The conversation starts correctly.
- Appointment scheduling works end-to-end.
- Test the internal agent from the Salesforce App to ensure:
- Internal topics trigger correctly.
- Scheduling flows run as expected.
10. Go Live
Once testing is successful:
- Publish changes to the Experience Cloud site for external use.
- Activate Messaging Channels and the Embedded Service Deployment.
- Activate the Agents.
- Train your team on how to trigger and use the internal agent.